
Put Ruuster listings on your website
Using Ruuster 1.0? Read the 1.0 version of this article.
Paste the loader tag into your site, build a listings snippet with options and agents in Embed Listings, and add it to any page.
Admins only. On Embed Listings (Admin), copy the loader tag into your website's head. Then build a snippet on the Listings Search (IDX) tab, choosing the agent, filters and options, and paste it where the search should appear.
Before you start
- Admins only. Embed Listings is under Admin in the sidebar.
- You need to be able to edit your website, or have a web developer who can. To let them build the code themselves, see Let your web developer build the embed.
- Read the MLS compliance note at the top of Embed Listings. You're responsible for making sure the embedded search follows your MLS rules and brokerage policies.
Add the loader tag to your website
- In the sidebar, click Embed Listings under Admin.
- In Installation, select the two lines under Loader tag and copy them (there's no copy button).
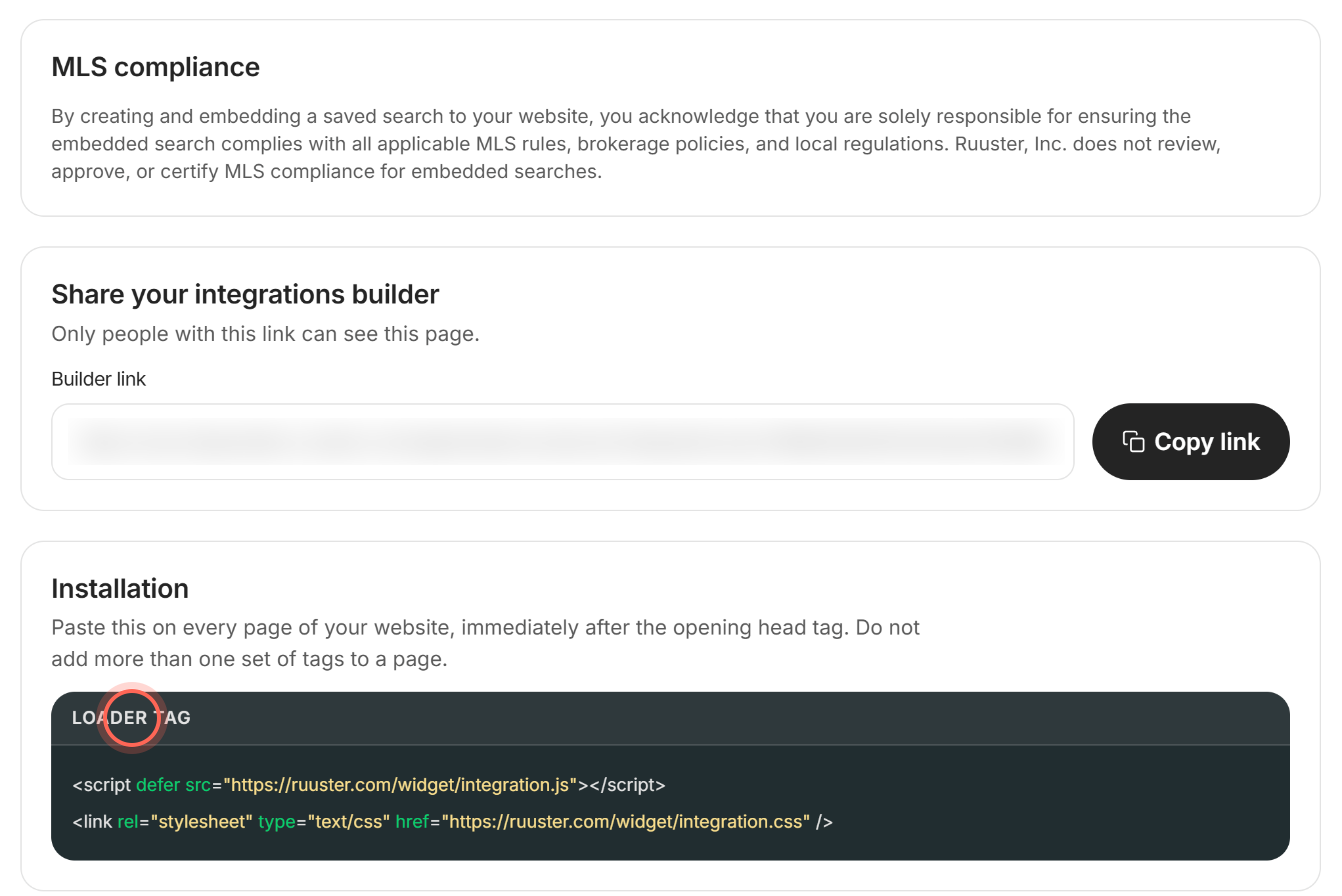
- Paste them on every page of your website, right after the opening head tag.
Nothing shows on your site yet. The loader tag is the same for every page and never changes, so add it once per page and leave it.
Build the listings snippet
- On Embed Listings, stay on the Listings Search (IDX) tab.
- In Your snippet, open Agents and pick the agent who gets the leads.
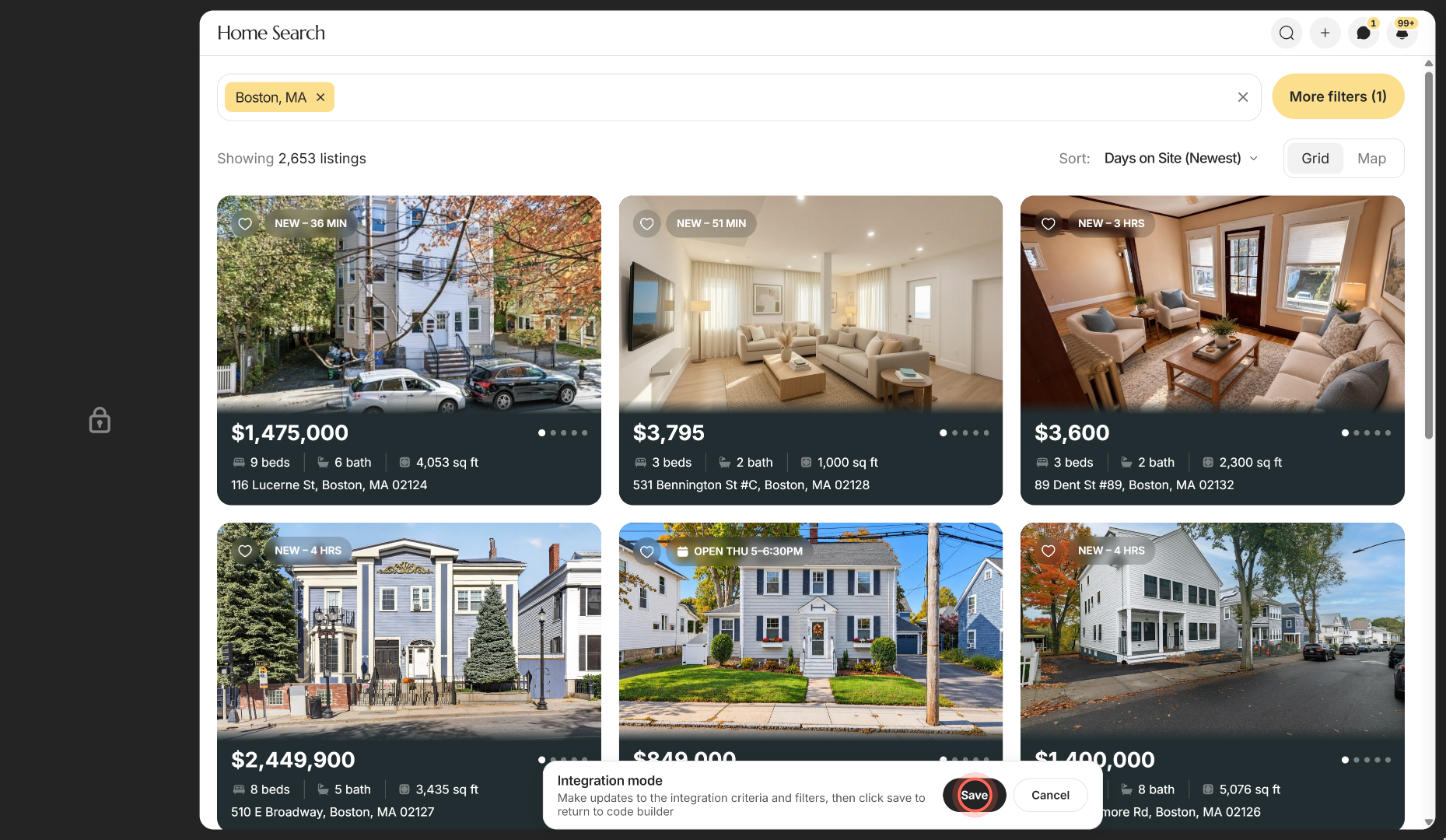
- Click Set filters.
- In the search, choose the location and filters, then click Save on the Integration mode bar.
- Back on the builder, set the Options you want (see the table below).
- Select the code under Listings Search widget code and copy it.
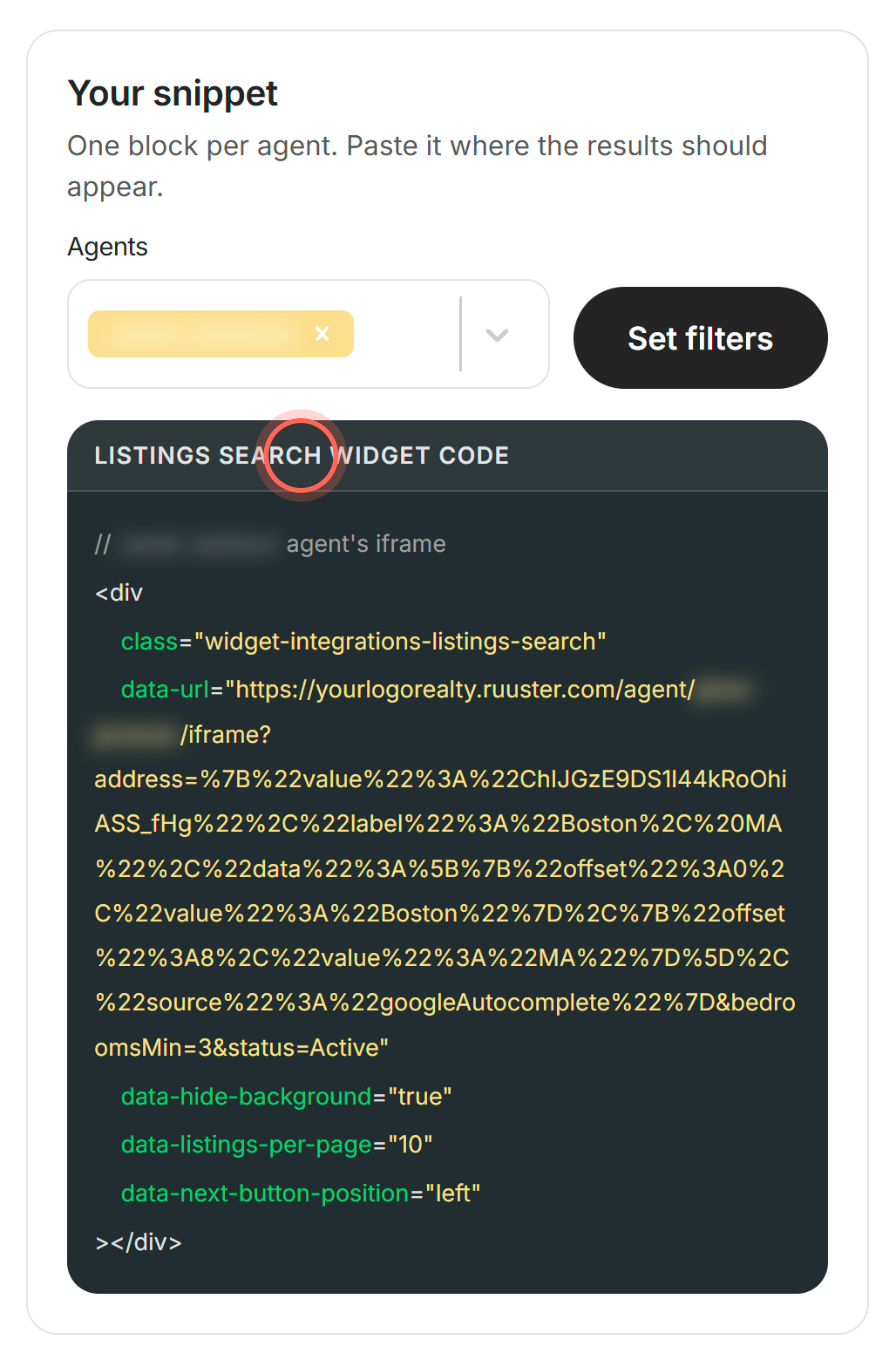
- Paste it into your page where the listings should appear.
Reload your web page and the search appears with your filters. Every change in Options rewrites the snippet, so copy it last. Want a search box on your home page that lands here? See Add the search bar to your website.
Choose the options
| Option | What it does |
|---|---|
| Open properties in a new tab | A click on a property opens its details in a new browser tab, so visitors stay on your page. |
| Hide the search bar | Hides the bar visitors use to change location. They see only your results. |
| Search bar menu placement | Where the address menu opens: Bottom, Top or Auto (picks the side with room). Shown while the search bar is visible. |
| Hide the action buttons | Hides the buttons for map view and for saving or sharing the search. Filters and sort stay. |
| Transparent background | On by default, so your site's background shows through. Turn it off to use the page background from your brand kit. |
| Listings limit | Unlimited, 3, 6 or 9. A number caps how many homes ever show and removes the next two settings. |
| Listings per page | 1 to 50, 10 by default. How many homes load before the visitor asks for more. |
| Next button position | Left, Center or Right: where the button that loads more homes sits. |
| Forced registration | Visitors sign up before they can open property details. See Make visitors sign up to see listings. |
| CRM tags | Up to 10 tags, 63 characters each, added in your CRM to everyone who registers through this snippet, or sends a question or tour request from it without signing up. Shown when Forced registration is on and your brokerage has a CRM connected. |
| Top margin | Pixels of space at the top for a fixed website header, so it doesn't cover the search or the property details. |
Good to know
- Leads go to the snippet's agent. Sign-ups and tour requests from the embed go to the agent in its code. Unassigned shows in Agents when your brokerage lets your CRM route leads; its pages show your default user's contact details.
- One block per agent. Pick several agents and the snippet has one block each, labelled with their name. Put each block on its own page.
- One search per page. A page shows only the first Listings Search on it. Use separate pages for separate areas.
- Nothing is saved in Ruuster. Your choices live in the code you copy and in the builder's page address, so bookmark the builder to come back to them.
- Updates reach every page. Ruuster improves the search behind the loader tag, so snippets already on your site keep working without new code.
FAQ
How do I show only our team's sold listings on a past transactions page?
Click Set filters, set Status to Sold, type your office's MLS ID in the search and pick it under Listing Office ID. Click Save and copy the new snippet. See Look up listings by MLS number or agent ID.
How far back do sold listings go on our site?
Up to a year. With Sold chosen, the Sold period filter reaches back to Last 1 year. Your MLS may share less than that.
I changed the options. Do I need to update my website?
Yes. Copy the new snippet and replace the old one on that page. The loader tag never changes.
Is this an iframe?
No. The snippet puts the search straight into your page, so it fits your page's width and scrolls with it.
Can I have different searches on different pages?
Yes. Set filters for one page, copy the snippet, then change the filters and copy again for the next page. Each snippet keeps the settings it was copied with.
The builder says "We couldn't load your agents." What now?
The code needs an agent to send leads to, so it can't build without the list. Check your internet connection and click Try again.
Still need help? Reach out to us at helpme@ruuster.com and we'd be happy to assist!